QR code, Scanning and Optical Character Recognition (OCR) in Ionic 4

QR code or barcode scanning is something almost every smart phone user has done at least once. We scan QR codes in supermarkets, on products in general, and oh, Amazon delivery ! It’s a very handy way to recognize products instead of entering 16 digit long ID numbers etc. Similarly, reading ID numbers from Passports etc could be very handy if you are an international hotel owner and require guests to carry passports as IDs. Or may be you want to read off a vehicle registration number using your phone.

Here are some potential use cases for these plugins in an Ionic 4 app
- Super market app — QR/barcode scanners can provide product info to users
- Delivery app — Barcode scan can track/sign off a package
- Quick access to offers — Scan QR codes and go to a webpage
- Web authentication of mobile app — Similar to Whatsapp Web
- Event app — Scan tickets or events passes
…… and many more
All this can now be done in Ionic apps, with latest plugins available in Ionic 4. In this article, we will focus on such plugins. Some of these plugins have been around since Ionic 1, and have been changing ever since, and some are new. So here are some of the scan plugins and functionalities you can implement with Ionic 4.
1. Barcode Scanner
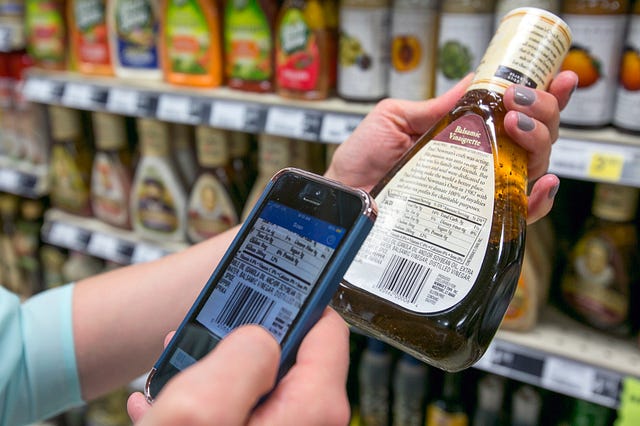
A barcode is an image consisting of a series of parallel black and white lines that, when scanned, relay information about a product. A barcode is used to automate the transfer of product information, for eg. its price, from the product to an electronic system such as a cash register. Barcodes are traditionally read by optical devices such as a barcode reader or scanner. New advances in technology allows consumers to scan barcodes with their smartphones and tablets using in-built cameras. Now you can do the same with your Ionic 4 app as well.
Install the plugin with
ionic cordova plugin add phonegap-plugin-barcodescanner
npm install @ionic-native/barcode-scanner
For all plugins, the step to import the plugin in a component will remain common (just change the plugin name)
import { BarcodeScanner } from '@ionic-native/barcode-scanner/ngx';constructor(private barcodeScanner: BarcodeScanner) { }After this, you can simple use the following function to complete a scan process.
this.barcodeScanner.scan().then(barcodeData => {
console.log('Barcode data', barcodeData);
}).catch(err => {
console.log('Error', err);
});
This function will open the phone’s camera, allow you to scan a barcode, and in result will provide success or error .
You can also pass an options object in the scan({options}) function. These options are
preferFrontCamera : true, // iOS and Android
showFlipCameraButton : true, // iOS and Android
showTorchButton : true, // iOS and Android
torchOn: true, // Android, launch with the torch switched on (if   available)
saveHistory: true, // Android, save scan history (default false)
prompt : "Place a barcode inside the scan area", // Android
resultDisplayDuration: 500, // Android, display scanned text for X ms. 0 suppresses it entirely, default 1500
formats : "QR_CODE,PDF_417", // default: all but PDF_417 and RSS_EXPANDED
orientation : "landscape", // Android only (portrait|landscape), default unset so it rotates with the device
disableAnimations : true, // iOS
disableSuccessBeep: false // iOS and Android
This plugin will of course require a camera and file saving access on the device, so take care of that as per your device. Since iOS 10 it’s mandatory to add a NSCameraUsageDescription in the Info.plist. To add this entry you can use the edit-config tag in the config.xml like this:
<edit-config target="NSCameraUsageDescription" file="*-Info.plist" mode="merge">
<string>To scan barcodes</string>
</edit-config>
For more details and issues, you can visit (https://github.com/phonegap/phonegap-plugin-barcodescanner)
2. BlinkId
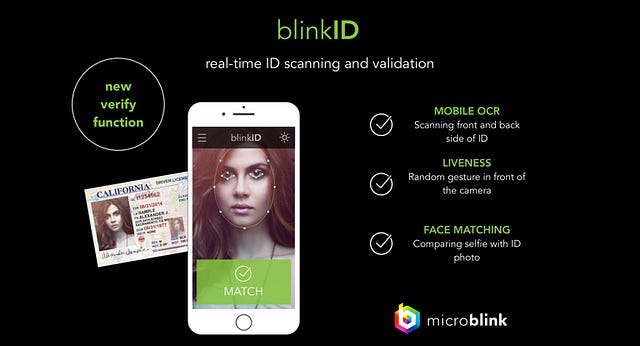
BlinkID uses mobile’s or web camera to capture data from ID cards, passports, driver’s licenses, visas, work permits, and other identity documents in just a few seconds. BlinkID supports all documents containing MRZ (Machine Readable Zone), which includes most passports and IDs. IDs and driver’s licenses with the PDF417 barcode are also supported. For certain documents, complete data extraction is available for both the front and back side of the document.
BlinkId is a product of Microblink Ltd. which is an R&D company which provides solutions to simplify data entry in mobile and web apps using camera input. You can also download their demo apps on Play store and App store to check out the features available. The SDK is a premium SDK, so free trial will only give you access to certain features of the SDK.
Before using the plugin, you’ll need to generate a free license from MicroBlink website. To Install the plugin in your app, use
ionic cordova plugin add blinkid-cordova
npm install @ionic-native/blinkid
Import the plugin in a component with
import { BlinkId, RecognizerResultState } from '@ionic-native/blinkid/ngx';constructor(private blinkId: BlinkId) { }After this, you can simple use the following function to complete a scan process.
const overlaySettings = new this.blinkId.DocumentOverlaySettings();const usdlRecognizer = new this.blinkId.UsdlRecognizer();
const usdlSuccessFrameGrabber = new this.blinkId.SuccessFrameGrabberRecognizer(usdlRecognizer);const barcodeRecognizer = new this.blinkId.BarcodeRecognizer();
barcodeRecognizer.scanPdf417 = true;const recognizerCollection = new this.blinkId.RecognizerCollection([
usdlSuccessFrameGrabber,
barcodeRecognizer,
]);const canceled = await this.blinkId.scanWithCamera(
overlaySettings,
recognizerCollection,
{ ios: IOS_LICENSE_KEY, android: ANDROID_LICENSE_KEY },
);if (!canceled) {
if (usdlRecognizer.result.resultState === RecognizerResultState.valid) {
const successFrame = usdlSuccessFrameGrabber.result.successFrame;
if (successFrame) {
this.base64Img = `data:image/jpg;base64, ${successFrame}`;
this.fields = usdlRecognizer.result.fields;
}
} else {
this.barcodeStringData = barcodeRecognizer.result.stringData;
}
}There is a great tutorial provided by MicroBlink related to the Cordova setup.
Refer to another video explaining the implementation of DocumnetVerificationOverlayand CombinedRecognizer
You can also checkout a sample PhoneGap application using BlinkID plugin , which is very similar to an Ionic 4 app — https://github.com/BlinkID/blinkid-phonegap
3. QR Scanner
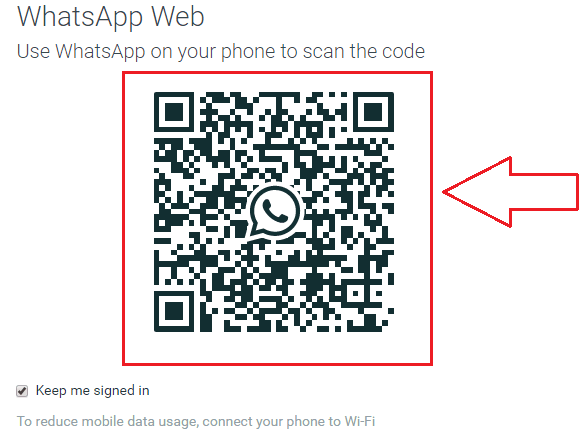
Looks familiar ? A Quick Response (QR) Code is a type of barcode that contains a matrix of dots. It can be scanned using a QR scanner or a smartphone with built-in camera. Once scanned, software on the device converts the dots within the code into numbers or a string of characters. For example, scanning a QR code with your phone might open a URL in your phone’s web browser.
QR codes are able to contain more information than traditional barcodes. And now your Ionic 4 app can scan QR codes very efficiently.
To Install the plugin in your app, use
ionic cordova plugin add cordova-plugin-qrscanner
npm install @ionic-native/qr-scanner
Import the plugin in a component with
import { QRScanner, QRScannerStatus } from '@ionic-native/qr-scanner/ngx';constructor(private qrScanner: QRScanner) { }After this, use the following method to get permission for scan, and then perform scan action.
this.qrScanner.prepare()
.then((status: QRScannerStatus) => {
if (status.authorized) {
// camera permission was granted
       // start scanning
let scanSub = this.qrScanner.scan().subscribe((text: string) => {
console.log('Scanned something', text);
this.qrScanner.hide(); // hide camera preview
scanSub.unsubscribe(); // stop scanning
}); } else if (status.denied) {
// camera permission was permanently denied
} else {
// permission was denied, but not permanently. You can ask for permission again at a later time.
}
})
.catch((e: any) => console.log('Error is', e));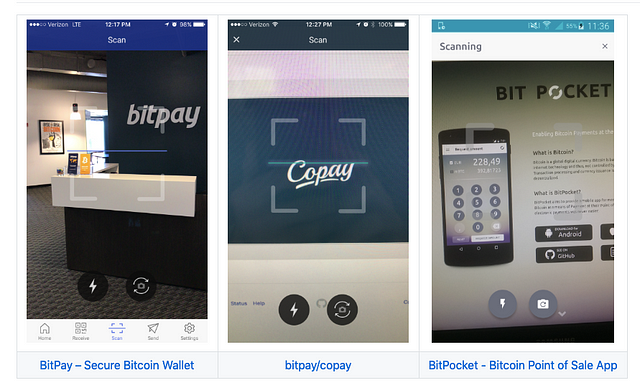
If camera permission was permanently denied you must use QRScanner.openSettings()method to guide the user to the settings page then they can grant the permission from there.
You can use QRScanner.useFrontCamera() to use front-camera for scanning as well.
Use pausePreview to pause the scanning while camera is ON.
Use resumePreview to resume the scanning.
Use destroy to run hide, cancelScan, stop video capture, remove the video preview, and to deallocate as much as possible.
For more details, you can visit https://github.com/bitpay/cordova-plugin-qrscanner
4. ABBYY Real-Time Recognition

ABBYY is a global provider of content intelligence solutions and services. It’s Real-Time Recognition SDK enables developers to add ‘instant’ text capture functionality to mobile apps. Payment data on invoices, personal information on ID cards as well as codes printed on daily goods for consumer contests, text on street signs or warning plates can be immediately captured and used in the mobile app — the user only needs to focus the camera at the text.
To Install the plugin in your app, use
ionic cordova plugin add cordova-plugin-abbyy-rtr-sdk
npm install @ionic-native/abbyy-rtr
Import the plugin in a component with
import { AbbyyRTR } from '@ionic-native/abbyy-rtr/ngx';constructor(private abbyyRTR: AbbyyRTR) { }You need to download ABBYY RTR SDK from https://rtrsdk.com/ (or get the extended version from the ABBYY Sales Team) and add it to your project:
- Create the
www/rtr_assetssubdirectory in the project. - Copy RTR SDK assets (patterns and dictionaries) and license file (
AbbyyRtrSdk.license) towww/rtr_assets. - Copy the Android library (
abbyy-rtr-sdk-1.0.aar) tolibs/android. - Copy the iOS framework (
AbbyyRtrSDK.framework) tolibs/ios.
Then you need to add libs/android and libs/ios to the linker search paths.
- For Android, add the following settings to
platforms/android/build.gradle:
allprojects {
repositories {
flatDir {
dirs '../../../libs/android' // cordova-android >= 7
dirs '../../libs/android' // cordova-android <= 6
}
}
}- For iOS, add the following to
platforms/ios/cordova/build.xcconfig:
FRAMEWORK_SEARCH_PATHS = "../../libs/ios"- After this, use the following method to perform scan action.
this.abbyyRTR.startTextCapture(options)
.then((res: any) => console.log(res))
.catch((error: any) => console.error(error));
this.abbyyRTR.startDataCapture(options)
.then((res: any) => console.log(res))
.catch((error: any) => console.error(error));
5. Zbar
ZBar is an open source software suite for reading bar codes from various sources, such as video streams, image files and raw intensity sensors. It supports many popular symbologies (types of bar codes) including EAN-13/UPC-A, UPC-E, EAN-8, Code 128, Code 39, Interleaved 2 of 5 and QR Code. Functionally it is more or less same as the other scanner plugins described above.
To Install the plugin in your app, use
ionic cordova plugin add cordova-plugin-cszbar
npm install @ionic-native/zbar
Import the plugin in a component with
import { ZBar, ZBarOptions } from '@ionic-native/zbar/ngx';constructor(private zbar: ZBar) { }After this, use the following method to perform scan action.
let options: ZBarOptions = {
flash: 'off',
drawSight: false
}
this.zbar.scan(options)
.then(result => {
console.log(result); // Scanned code
})
.catch(error => {
console.log(error); // Error message
});Conclusion:
In this post, we learnt about four great plugins for scanning different types of text, codes etc. for your Ionic 4 app. You can use these plugins in various apps to make the app more user friendly and faster to process data. Stay tuned for more interesting posts on Ionic 4 — plugins, features and apps.


